
Tired of seeing your treasured memories languish in faded, discolored boxes? Is there a way to rescue these photos and restore them to their former glory? Yes, there is! In this blog post, we’ll walk you through the simple process of reviving old and damaged photos with just 5 easy steps. Let’s get started!
Reasons for restoring old and damaged photos
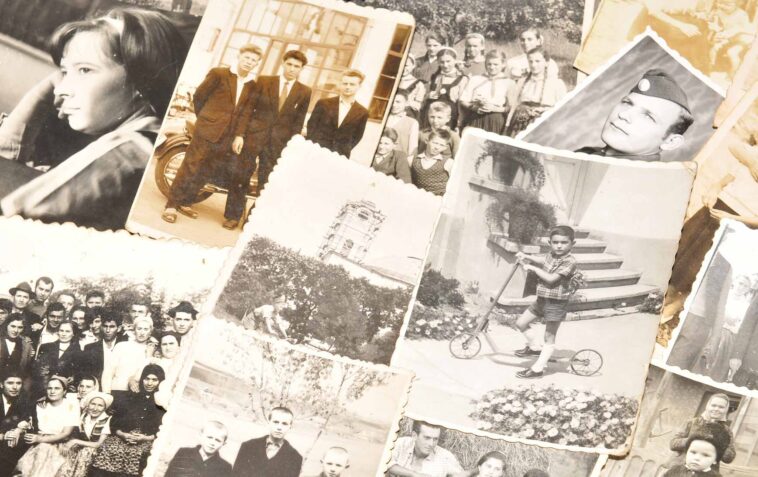
They are more than just art — they’re a window into the past. With proper restoration, they can be revived back to their original condition. Old and damaged photos — especially those with sentimental value — can benefit greatly from restoration services.
The most common reasons for restoring old photos include:
-Removal of physical damage caused by stains, mildew, water damage, etc.
-Color correction to restore the original vibrancy of colors
-Repairing fading and discoloration caused by age
-Adjustments in contrast: As a result of these adjustments, details within the original photo may become more visible, such as facial features or architectural details that were initially unclear or washed out.
–Digitization of pictures so that they can be shared easily on electronic devices such as phones or computers. Digital copies also make it easier to print copies or create backups for safekeeping.
Step 1: Gather the necessary materials

Restoring an old or damaged photograph can be a rewarding project, and it can also be a challenging one. Before you get started, make sure you have all of the necessary materials to complete the job. You’ll need access to a scanner or photo editing software, old photo restoration software, gloves for handling the photo with care, a lint-free cloth for polishing the image surface, archival quality paper and mounting supplies for preserving the photograph. Lastly, you’ll need patience and precision to make sure your project turns out exactly as you envisioned.
Step 2: Scan and digitize the photos
In order to begin the restoration process, you must first scan and digitize it. This is necessary so that you can make repairs digitally without affecting the original image. The easiest way to do this is to use a scanner that supports high-resolution scanning of photos. Most modern scanners can do this for you quite easily and quickly — just be sure you follow the instructions provided by your scanner’s manufacturer to ensure that your digital images will be of high enough quality for restoring them later.
Step 3: Edit and enhance the photos
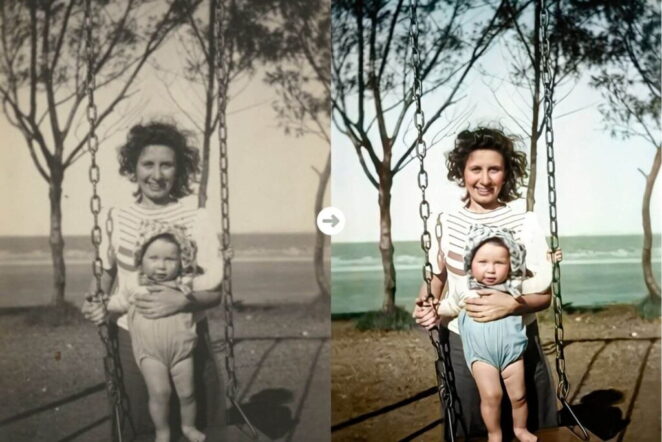
Now that you have scanned your damaged images, it’s time to start editing and enhancing them. You can begin by using the automatic color correction feature of your editing software as a starting point. This tool can quickly adjust basic color settings such as contrast and brightness to enhance the image. If you don’t use an automatic tool, carefully adjust each setting individually until the image looks more vivid and detailed.
In addition to adjusting colors, there are a few other tools that can be used to enhance your image even further. For example, you can sharpen blurred areas of an image or use the clone tool to remove scratches on photos with digital dust or scratches. You may also want to consider removing blemishes, redeye, and other distracting elements from your pictures before printing them out or publishing them online.
Step 4: Print the photos
Printing them is a crucial step towards restoring and preserving them. The primary goal is to create a new and improved image that can be shared with friends, family, or visitors. Even if you are not an expert in photography, there are some basic tips that can help you enhance your prints.
When selecting the size of your print, think about the purpose for which it will be used. If it is for an album or family memento, then a smaller size would be more suitable; it’s better to print on thick photo stock paper so that the images will stand up to time. For larger prints in a frame, use glossy paper and select a higher resolution image size so that details remain crisp and vibrant when enlarged.
Be sure to set up your printer with ink-resistant settings before printing so that your precious photos aren’t damaged by smudges or smears from fading inkjet colors over time. To save money but still bring out all of the necessary details in the images you’re printing, opt for economical black-and-white printing or choose economical settings such as grayscale or draft mode with lower dpi resolution instead of high quality mode with speedier resolutions (which uses more ink). Be aware of which type of printer you’re using and always read the manufacturer’s instructions first in order to determine how best to get accurate results each time you print.
Step 5: Store the photos safely

After all the hard work you’ve put into restoring and preserving your old photos, you’ll want to make sure that their newly restored state is preserved for years to come. Here are some tips for storing photos in a safe manner.
Choose an appropriate storage container: Select an acid-free, lignin-free box or image file cabinet with dividers to ensure that photographs won’t damage or stick together. Also consider keeping digital copies on memory cards or in the cloud.
Control temperature and humidity: Too much moisture can lead to mold, while extremely cool temperatures can damage images. Aim for a temperature between 65-70⁰F (18–22C) with 40-30% relative humidity.
Reduce light exposure: Avoid direct sunlight and fluorescent lighting, as that may cause irreversible damages such as fading of the dyes while ultraviolet radiation can cause color shifting and deterioration of your image over time.
Avoid sticking things to images: Adhesives can ruin old prints, so refrain from using staples, rubber bands, tape or glue that could permanently damage your precious images over time.
Handle with care: While handling prints is unavoidable, always use cotton gloves when possible when handling photographs directly to reduce potential oils on the surface from skin contact.
Conclusion
In this tutorial, we discussed how to restore old and damaged photos in several easy ways. The most important part is to make careful and thoughtful decisions about which restoration technique to use. Experimenting with various methods can be a great way to see what works best for a particular photo.